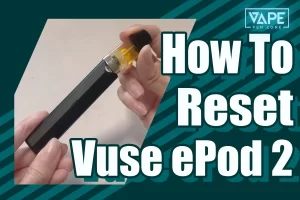
Want to fill Vuse ePod with your favourite e liquid or replace a burnt coil? None of these things can be done if you can’t open it.
So, how to open Vuse pods? Vape Pen Zone will provide detailed step-by-step instructions so you can easily open the device in 5 minutes. The details are as follows:
- Pull the pod out of the device
- Hold the metal bottom cover of the pod with the pliers
- Apply pressure and twist the pliers from side to side
- Remove the coil and transparent gasket
- Clean the pod with a paper towel
- Put the coil and gasket back into the pod
- Put the metal cover back on
But can you still open Vuse pods when there are no tools around? Please read on, we will reveal the answer in the next content.
🚫 Note: Vuse NZ is a disposable pod vape. It can’t be opened. Please make sure you carefully consider the consequences and risks.
Introduction
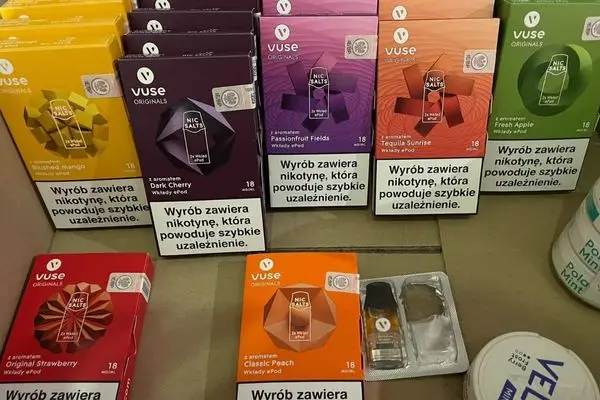
When buying the Vuse starter kit, though, they come with a user guide, but the information about how to open the device is not mentioned on it.
As a result, many users are often curious about how to open it. However, if not handled correctly, the device may be damaged.
For this reason, we consulted several vape experts on social media and collected relevant videos.
Finally, we have compiled this comprehensive operating guide. To learn the exact steps, read on!
How To Open Vuse Pods?
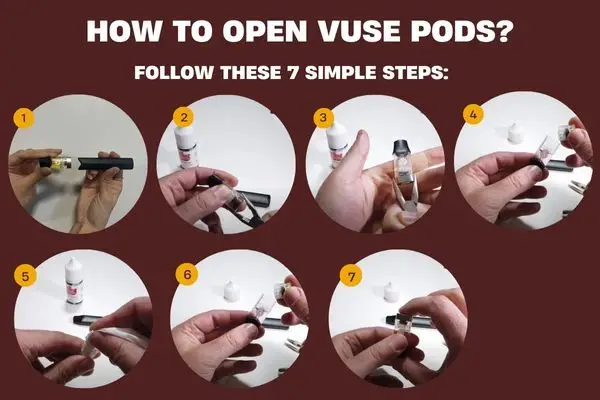
Opening Vuse Pods NZ is not complicated and requires only a few simple steps. However, improper operation can lead to damage to the device and accidental injury.
Therefore, please make sure that the details of your operation are consistent with the specific steps described below.
Tool Preparation Before Opening Vuse Pod
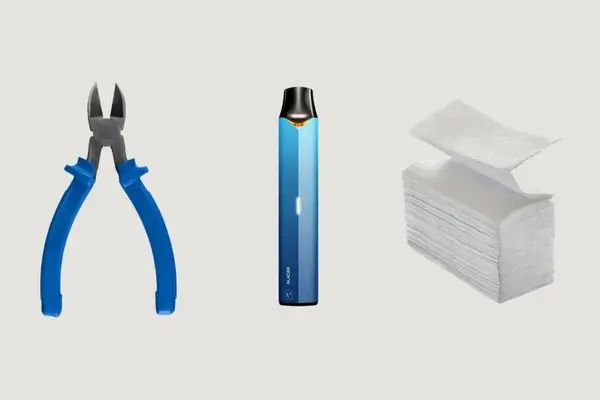
To open the pod vape smoothly, we need to prepare the following items in advance:
- A Vuse device
- Pliers
- Paper towel
How To Open Vuse Pods – Step By Step
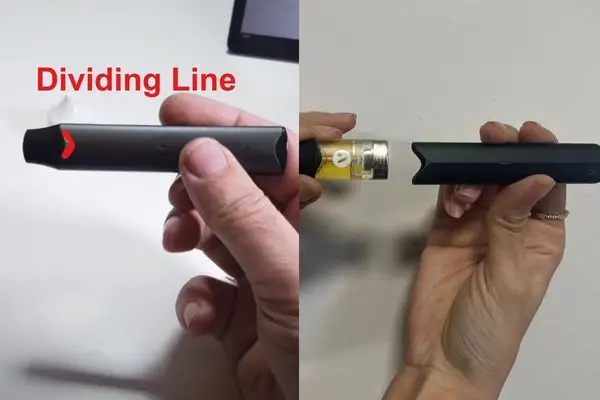
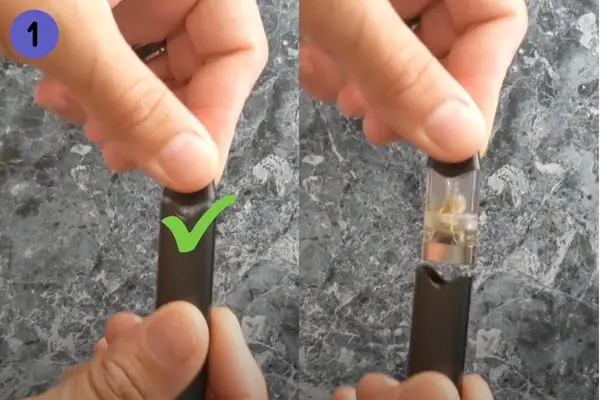
#1 Pull the pod out of the device
The pod can be separated from the device by pulling the mouthpiece upwards along the dividing line of the device.
Due to the magnetic contact base, the pod can be easily pulled out of the device.
#2 Hold the metal bottom cover of the pod with the pliers
- Clamp both sides of the metal bottom cover with pliers.
- To prevent the force from being easily generated, wrapping the metal bottom cover with a paper towel can increase the friction to a certain extent.
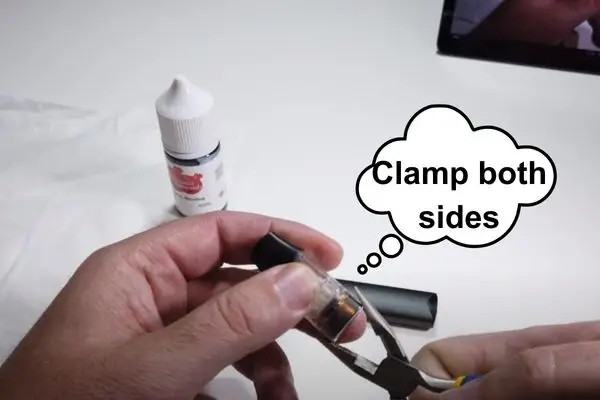
#3 Apply pressure and twist the pliers from side to side
- To release the base faster, twist the pliers from side to side continuously and several times.
- When you see the groove in the base getting bigger, use a little force to remove it.
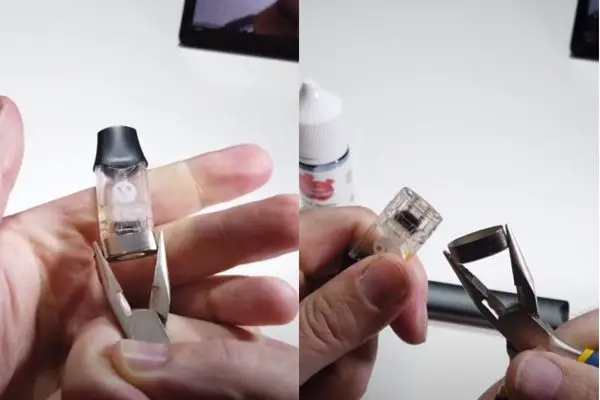
#4 Remove the coil and transparent gasket
- To better protect the internal parts from damage, gently remove the coil and gasket using the tip of a pair of pliers.
- The gasket prevents the e-liquid from leaking, so keep it safe after removing it.
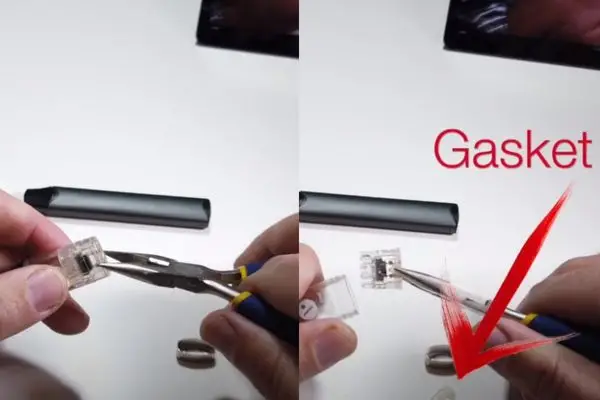
❗️ Note: Sometimes, the coils and transparent gasket come off with the metal bottom cover.
#5 Clean the pod with a paper towel
- To prevent the flavour of the subsequent e-liquids from being affected, please twist the paper towel into a ball and reach inside the pod to clean the residual build-up.
- For a more thorough cleaning, use a cotton swab and swirl it around for better results.
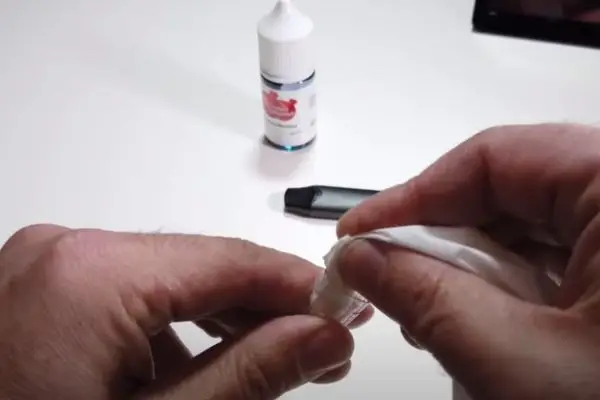
#6 Put the coil and gasket back into the pod
- Take the transparent gasket and place it on the bottom of the coil.
- The gasket needs to be securely fastened to the coil. Otherwise, it will cause the e-liquid to leak and affect how we vape.
- Place the coil and gasket back into the pod.
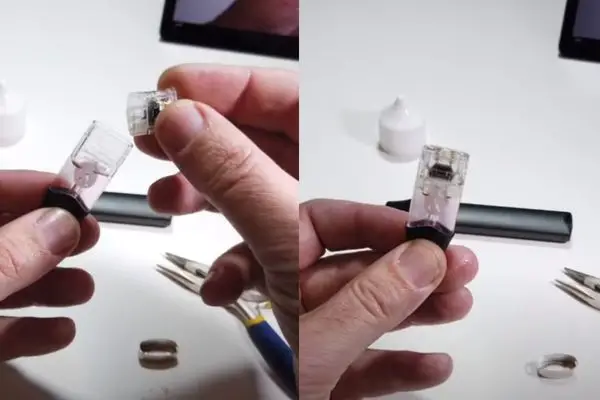
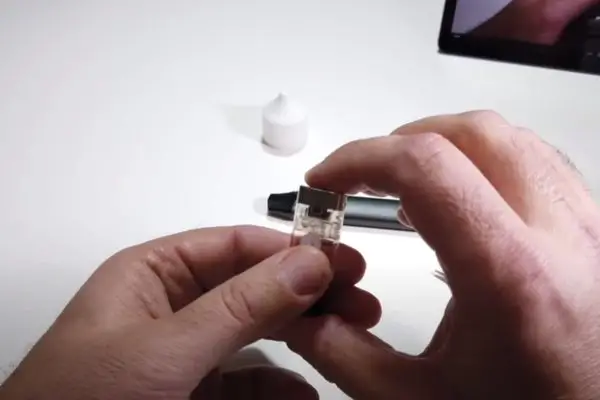
#7 Put the metal cover back on
- Place the metal bottom cover on top of the coil and press it down firmly.
- When you hear a slight “click” or “clack” sound, the cover has been successfully seated in the pod.
How To Open A Vuse Pod Without Pliers?
You need to use pliers every time you open a pod, which can be a hassle. Here, I am going to share a way to open the device without any tools without any problems.
Please check the step-by-step instructions below carefully for details:
1. Along the dividing line at the mouthpiece, pull the pod upwards.
2. Locate the holes on either side of the metal bottom cover and align any small hole with the device’s sharp corner.
3. Pry the bottom cover up and down with rhythmic force.
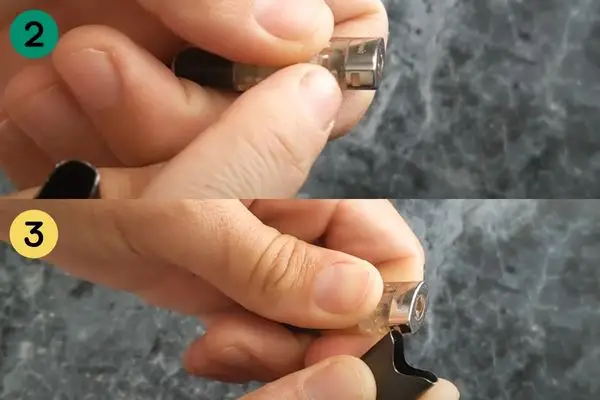
4. When the bottom cover is lifted up at one corner, flip the device over and push down on the other hole.
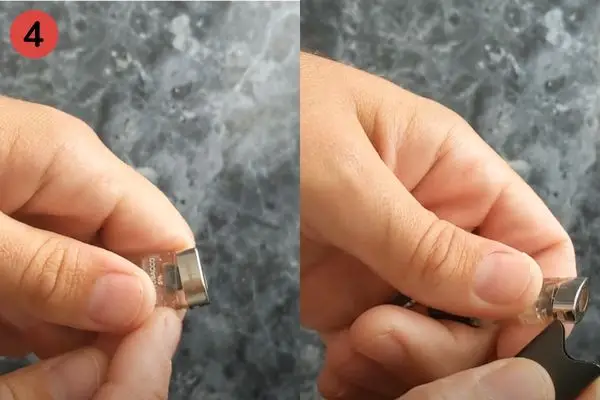
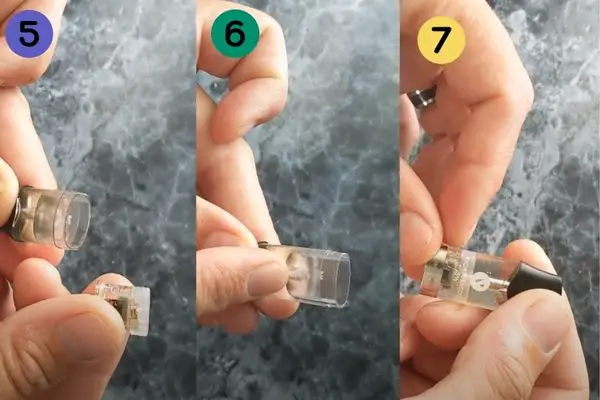
5. Pull out the transparent gasket with your fingernail or the sharp corner of the device.
6. Check for coil and e-liquid leakage.
7. Assemble the pod and return the coils, gasket and metal cover to their original position.
How To Make Vuse Pods Last Longer?
🌡️ Store the device in a cool and dry place: The ideal storage temperature for vapes is 15℃-25℃.
🕐 Reduce vaping time: Reducing vaping time to 3-5 seconds prevents excessive e-liquid consumption.
🧻 Keep the device clean: Regular cleaning of the device and its pods will help prolong their life and provide a good vaping experience.
🔋 Charge your pod vapes in time: Charge your Vuse Vape NZ when fully depleted to help protect the battery’s performance.
Verdict
In summary, opening the Vuse Vape involves some risks, and we need to proceed with caution.
But just in case something unexpected happens during the disassembly process, we recommend picking up multiple Vuse devices as backup vapes at Vape Shop New Zealand.
In addition, for orders over NZ$50, you can enjoy overnight delivery.
Doesn’t that sound very tempting? Adding your favourite products to your shopping cart quickly!
FAQ About How To Open Vuse Pods
How do you open a vape pod?
To open a vape pod, follow the steps below:
1. Hold the pod firmly with your index finger and thumb.
2. Remove the cap from the top of the pod by giving it a gentle pull.
3. Fill the pod with your favourite e-liquid using a dropper or syringe.
4. Put back the top cap and insert the pod into the device.
How do you remove the cap from an Alto pod?
Removing the cap from an Alto pod requires only the following two simple steps:
1. Clamp the sides of the bottom cover with pliers.
2. Twist the pliers from side to side to loosen the bottom cover.
How do you unlock the VUSE ePod 2?
Unlock the ePod 2+ with three quick presses of the side button or via the MyVuseApp application.
Can you refill pods in Vuse?
The Vuse device uses pre-filled pods, so there is no need for us to refill the vape juice ourselves. When the vape juice runs out, simply replace the entire pod.
How to refill Vuse Epod 2?
The steps for filling the Vuse ePod 2 with vape juice are detailed below:
1. Prepare the tools for the filling process: pliers, vape juice and paper towels.
2. Pull the pod out of the magnetic contact base.
3. Remove the metal base with the pliers.
4. Remove the coil and gasket with the tip of the pliers.
5. Stick the paper towel inside the pod to clean any residual build-up.
6. Slowly fill with vape juice using a dropper or syringe.
7. Put the coil, gasket and metal base back into the pod.
8. Reconnect the pod to the Vuse ePod 2.0.
How many times can you refill a Vuse pod?
The Vuse pod is a disposable pod that is not refillable. The act of opening the device to fill it with vape juice is not encouraged.


